Introduction
The ability to provide real-time customer support and interact with customers in real-time is no longer an option for businesses but a necessity in today’s world. By integrating Chattrik’s live chat widget onto your website, you can provide customers with immediate assistance, resolve concerns much more quickly, and therefore gain more leads than before.
Chattrik allows businesses to use live chat as a powerful tool to create a personal experience for the visitor while also allowing real-time visitor engagement. In this blog, you’ll learn how to integrate a chat widget onto your website and respond to your customers’ needs from start to finish!
The Importance of Integrating Live Chat
Many brands use live chat to improve customer experience, minimize bounce rates and increase conversion rates. By adding a live chat application to a website now, businesses will be able to:
- Quickly respond to website visitors without requiring them to submit a contact form first
- Automatically create personalized support for their customers based on current visitor activity and the customers’ previous website interactions
- Collect leads from the website directly
Use the Chattrik live chat application to provide high-quality customer support via a variety of useful features that help your employees manage their live discussion sessions effectively.
Steps to Integrate a Chat Widget into Your Website
Step 1: Log in to Your Chattrik Dashboard
In order to get started with integrating live chat into your site, the first thing you must do is log in to your account at Chattrik.
To log in:
- Go to chattrik.com on any Internet browser
- Click on the “Login” link located at the upper right corner of your screen
- Enter the email address and other credentials in order to log in to your dashboard.
Now that you are logged into your Chattrik dashboard, you will be able to configure your settings, view visitor activity, and create a widget for your site.
Step 2: Navigate to the widget Installation to create a widget:
Once you’re on the dashboard, explore installation instructions. You are required to:
- Click on the “Settings” link in the left side navigation bar.
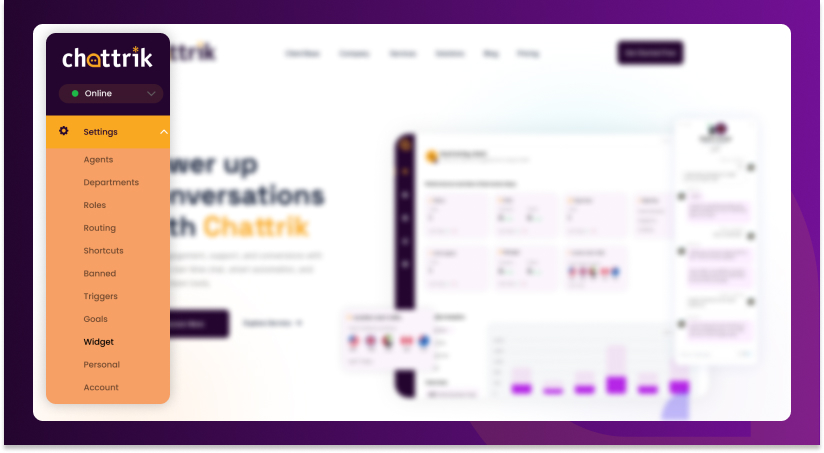
- Locate either the “Widget” section or “Install your Widget” section
- Locate the “Installation Instructions” panel Chattrik provides you with your own small piece of JavaScript to install in your site.
This small piece of code tells your site where to load the Chattrik live chat widget when you install it on your site.
Step 3: Copy the Chat Widget Script
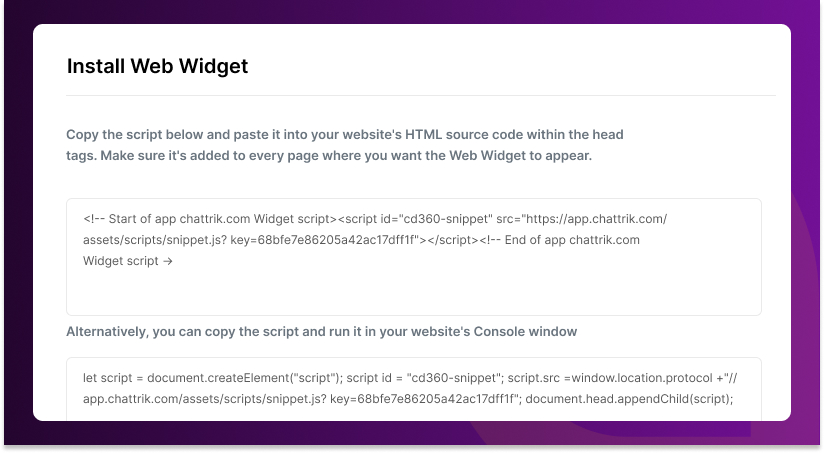
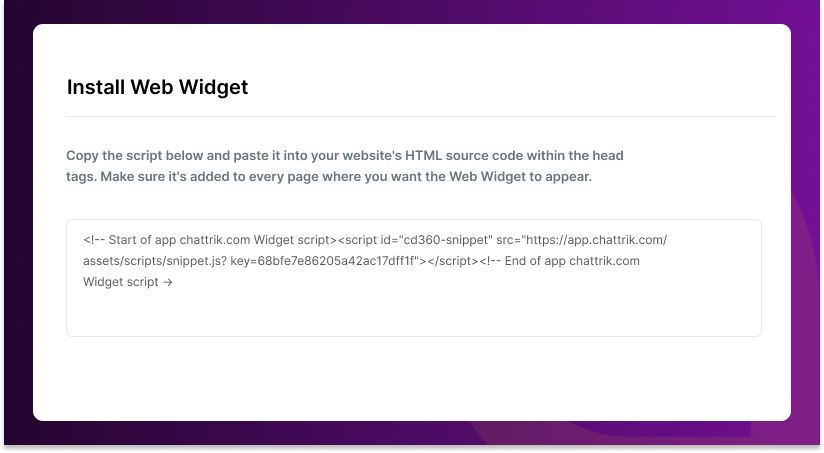
In the Installation Instructions:
- You must copy the code snippet provided. This JavaScript snippet loads the Chattrik live chat widget on your website(s).
- Ensure that you copy the entire script as any missing sections will prevent the widget from loading successfully.
This method works on all types of websites. Whether your website is custom-built or uses one of many platforms such as WordPress, Shopify, etc. It will work with all platforms.
Now, let’s move to the actual live chat integration with your website.
Step 4: Add the Script to Your Website
Now, let’s move to the actual live chat integration with your website.
For Custom HTML Websites
Open the HTML files for your website and insert the script prior to the closing tag on all pages where you want the Chat widget to display. This will allow the widget to be loaded correctly and prevent it from hampering or interrupting other items on the web page.
For Platforms such as WordPress
Log in to your WordPress Admin dashboard and select Appearance > Theme Editor (if a header script plug-in isn’t used).
Access the header.php file for the active theme on which you would like to display the Chattrik Chat widget. Following that, insert the Chattrik script and then proceed to the closing and Save option.
If you are utilizing a “Script Manager” or “Tag Manager”, you may also copy and paste the Chattrik script into either of these. Make sure to configure it to load on all pages of your site.
Step 5: Reconfirm the installation
After you have added the script, you will then need to refresh your website in a browser session. You’ll be able to see the live chat widget appearing in the lower right corner of your screen. To see if the widget works and loads correctly, perform a test chat.
If the widget does not appear:
- Double-check if the script has successfully been added to the section of your website.
- Clear your web browser’s cache and refresh the page.
- Verify that your Dashboard settings are set to “Active”.
Tips for Successful Chat Integrations:
Customize Your Chat Widget
After installation, you can style the Chat widget to match your brand colours, add a pre-chat form for collecting visitor details and customize automated greeting messages and proactive invites.
Use Trusted Domains
Configure your trusted domains in Chattrik, this allows your Chat widget to only load on authorized URLs (thus increasing security and data protection).
Monitor and Optimize
After integrating the widget into your website, monitor visitor activity and team performance using the Chattrik Dashboard, and use the information collected to optimize your support strategy, thereby improving your Return on Investment for the Chat widget.
Final Thought
Chattrik’s live chat integration process is not complex. No complex programming is required to install and integrate the widget onto your website. However, only a basic script and minimal time are needed for implementation. Once installed, you will have access to real-time interaction to increase visitor interaction and produce results.
If you operate a retail site (e-commerce), SaaS, or service-type business, integrating Chattrik live chat on your site allows you to interact with users immediately and convert them to customers quickly.